Twitch and Mixer might draw the majority of news when it comes to big name streamers, but sometimes it’s easiest and best to stick with what you know. YouTube’s streaming service works very well with minimal setup, and if you’ve already built up an audience there, it’s the ideal place to start livestreaming. Ready to share your gaming talent online? Follow the ten simple steps below to learn how to set up a professional YouTube stream in no time at all.
Step 1: Download OBS

The first step on your journey to become a YouTube streaming savant is to download and install Open Broadcaster Software, or OBS. This free streaming software will let you capture footage from multiple sources and set up your streaming overlay with images, webcam footage, text, and much more. It’s the perfect bit of kit for a new streamer, so head over to the download page and grab the installer for your operating system (Windows, Max or Linux). Don’t worry, we’ll walk you through how to use OBS below.
Step 2: Run an internet speed test
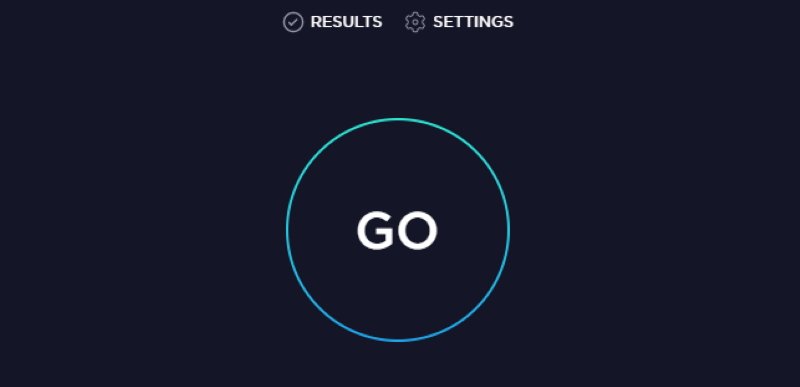
Next up is an internet speed test to gauge the quality you’ll be able to stream at. Visit speedtest.net and take note of the results. When it comes to streaming, you’ll want to use around 1/3 of your maximum upload speed to ensure you have a smooth stream.
In a slightly irritating quirk, speedtest provides your speed in Mbps, while OBS measures in kbps. That means you need to multiply the speedtest result by 1000, then divide by 3 (alternatively just multiply by 333.3) to get the speed you’re after. For example, if speedtest outputs a bandwidth of 11.5Mbps, multiplying by 333.3 gives you a streaming bandwidth of 3833kbps, which we can round up to 4000kbps for convenience’s sake.
Step 3: Set up your stream type
With OBS open, choose the settings option from the bottom right panel. When the menu opens, swap to the Stream tab and pick Stream Type. Select YouTube for the streaming service and choose Auto Recommend or your closest server (if you happen to know it).
Step 4: Get your stream key

We now need to tell OBS where you’ll be streaming to, and that means getting your Stream Key from YouTube. Assuming you’ve already made an account (do that first if you haven’t already), the quickest way to do this is to click the icon in the top right of your screen that looks like a camera with a plus in it. This will open a small dropdown menu. Click Go live.
On the new screen, swap to the Stream tab at the top instead of Webcam. You’ll now be presented with a menu letting you choose the stream name, type, target audience, thumbnail and the time it’ll go live. This can also be used to schedule streams in future, letting your subscribers know when you plan to go live. Don’t worry too much about these details just yet, as right now we’re just working through the set-up steps. In fact, we recommend setting this first stream to Private so that you can test that everything works.
Enter what you like, click Create Stream, and you’ll be shown a Stream Preview page, and likely a Stream Setup help box (if not, the Stream key should be under Stream Settings). The code you want from here is the Stream name/key. Copy this with the large button, then swap back to OBS and enter it into the Stream Key box in the Stream tab. Hit apply to save your settings.
Note: Do not share your stream key with anyone else or they will be able to take full control of your stream.
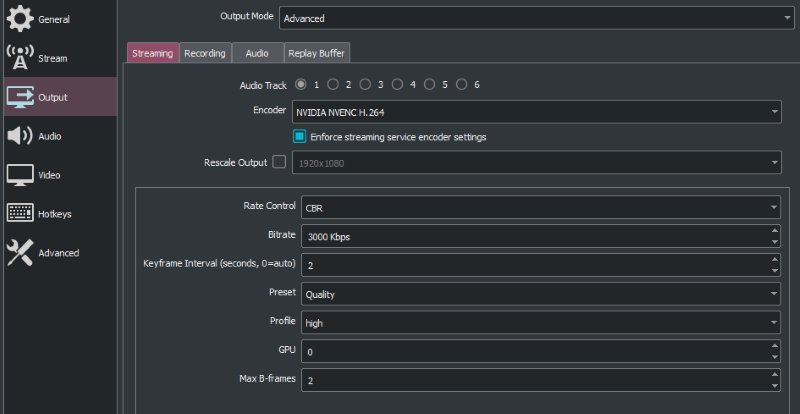
With your stream key entered in OBS, swap to the Output Tab. Set the video Bitrate to 1/3 of your upload speed, then Set Encoder to x264 for CPU or NVENC for Video Card. If you have a good NVidia graphics card and a weaker CPU, NVENC is recommended.
Step 6: Change your output resolution
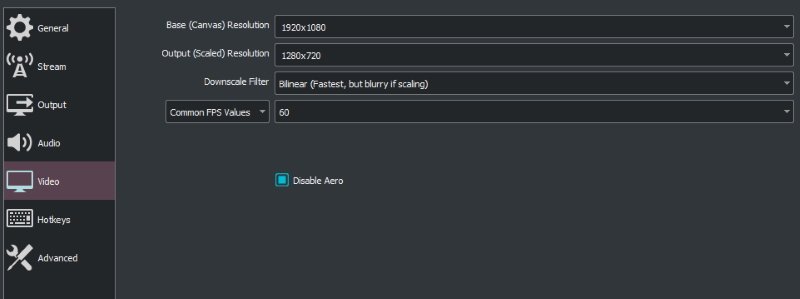
Swap to the Video tab to adjust the stream resolution. If your speedtest result wasn’t above 10Mbps, it’s recommended that you stream in 720p at 30fps. If you’ve got a better connection and a powerful computer, push the setting up to 1080p at 60fps for the best quality stream. Twitch partners can set their bitrate in OBS to 6500 kbps (maximum allowed), but if you're not a Twitch Partner, then 4000 kbps is the recommended value to go for. If your connection isn’t as fast, dropping this to around 2400 is also acceptable.
Step 7: Hotkey setup

Before you start streaming, it’s worth taking the time to set up some hotkeys in the settings tab. These will let you change scenes or start and end the stream with ease. It’ll save you the extra time of swapping out from your game, so take the opportunity to save yourself some time. Your future self will thank you! Don’t forget to hit apply after entering them.
Step 8: Set up Scenes and Sources
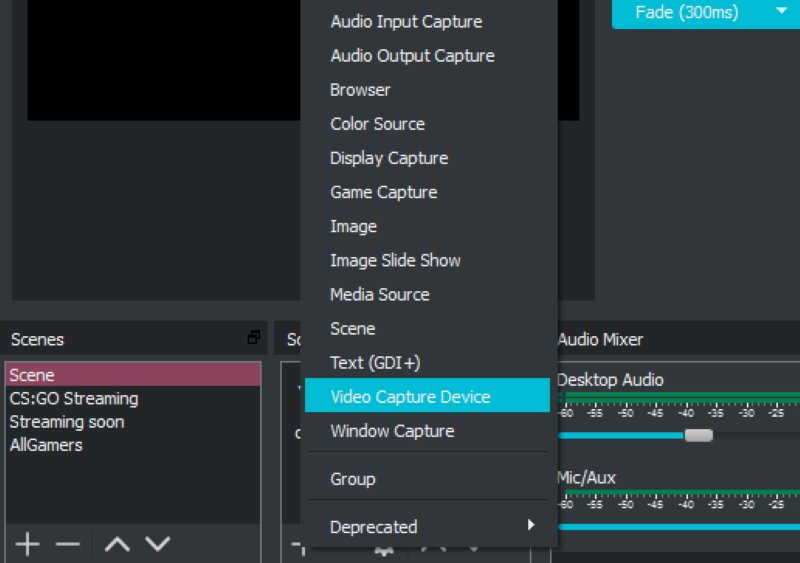
You now need to add scenes and sources to your stream to show the game, webcam or anything else you’d like to stream. You should already have a starting Scene, so from the main OBS screen, click the Add button (the plus shape) under Sources and choose Video Capture Device, then choose your device. We don’t recommend tweaking any of the default settings here.
If you want to add your webcam, for example, click the Add button, then Video Capture Device, then pick your connected webcam from the list. You can also add images and other features you’ve prepared by selecting the relevant option after clicking the Add button. You can adjust the size and position of the elements you add on the black preview screen above.
Note: The video source at the top of the list will always be the one that is shown above others.
Step 9: Adding a game source

Now for the juicy part, capturing a game. You need to load up and run the game you want to stream, then tab out of it and return to OBS. Click the Add button again and select Game Capture. Enter a name under Create New and click OK. Next, click the Mode box and swap to Capture specific window. On the Window list, find your game, select it then click OK.
The OBS screen will stay black unless the game is running and not minimized. If you only have one monitor, running the game in Windowed mode is a good way to let you keep both from being minimized. Alternatively you can select Monitor Capture, but this will stream anything shown on your screen including web pages, making it vital you don’t display any private information (Like say, bank account numbers or passwords). Remember to shift around the order of the scenes you’ve added so that your webcam or overlay (if using) appear on top of the game capture in the OBS example box.
Note: Make sure you are aware of what is on the monitor that is being captured, as it will broadcast everything on your monitor.
Step 10: Setting up a green screen
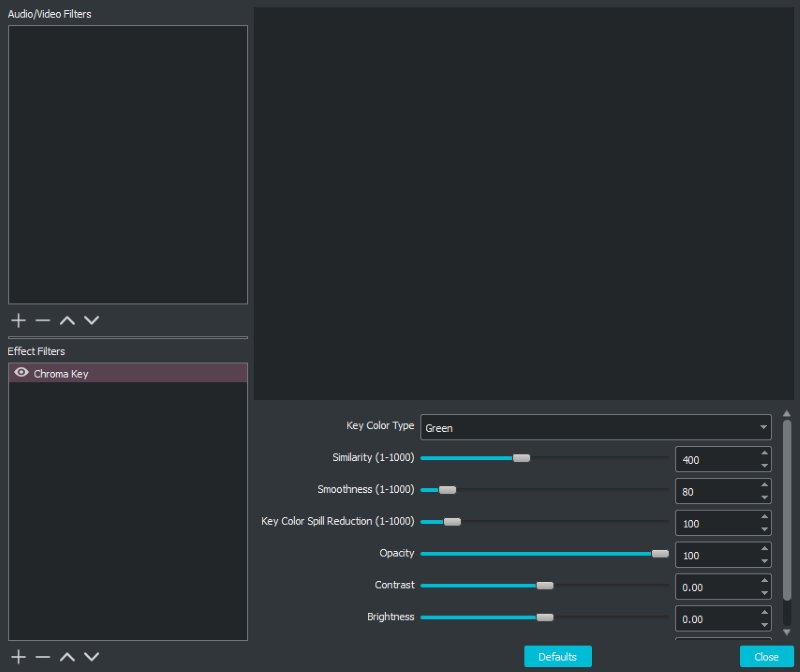
If you’ve got a green screen for your webcam footage, you can set this up be right clicking on your webcam source and selecting Filters. Click the Add button at the bottom left of the Effect Filters box and select Chroma Key. Now choose Key Color Type and match it to the color of your screen (typically green). You can adjust the dials below to produce the best effect for your green screen.
Step 11: Start the stream!

With your scenes set up, you’re now ready to begin streaming. Click Start Streaming on OBS then swap back over to YouTube, where after a short delay, you should see the preview from OBS come through on the left side. Check that YouTube reports the connection as excellent below the preview. If it doesn’t, you may need to stop the stream in OBS and reduce the bitrate or resolution depending on whether your internet connection or computer is the weak link. If you can see the preview, have your title set ,and are happy with the connection, you can now hit Go Live in the top right to begin streaming!
Now that you know how to stream on YouTube, you might want to work on streaming from console, as well. For that you’ll need to pick up a capture card such as an Elgato, which will let you select that as a scene in OBS. You should also consider picking up a high quality microphone such as the HyperX QuadCast to make sure you can talk to your viewers clearly.