One of the many benefits to owning a mechanical keyboard – other than the option to swap out your standard keys with creative custom keycaps – is the ease at which you can take apart and clean the whole keyboard, something you are unable to do with a membrane keyboard. Whether it's to remove dust, dirt, and hair, or to wipe down after an unfortunate spill, attempting to figure out how to clean a mechanical keyboard can be scary if you've never done it before. With a bit of guidance, though, you'll have a pristine board again swiftly.
Here are some simple steps that will help you clean your mechanical keyboard:
Removing the keycaps
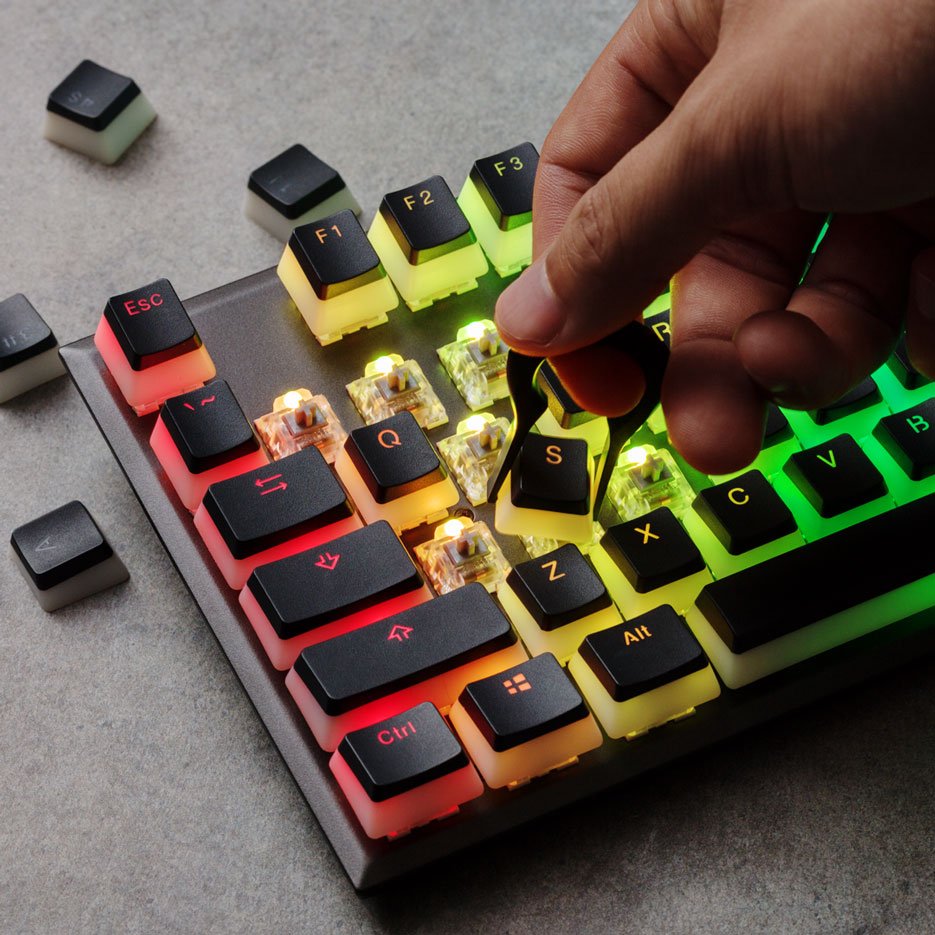
Before we get started, unplug your keyboard. We don’t want moisture and electricity mixing. Plus, if you’re using a mechanical RGB keyboard or a mechanical keyboard with any type of backlighting, the bright lights might be a distraction during the cleaning process (even if they are creating a gorgeous, game-inspired design). Once the keyboard is unpowered, the first thing you should do is to learn how to remove and replace the keycaps.
Our article here shows you how to easily remove and replace keycaps without any bumps in the road. Using a key puller, remove the keycaps from your keyboard. It is recommended to do this in groups and to organize the removed keycaps so that you can put them back on without having to remember which key goes where. If you're not sure, take a photo of the layout before you start removing the keys.
Make sure to carefully remove the larger keys like the space bar, shift, and enter keys because on some keyboards these will have a support bar underneath that is easy to break and hard to replace. Take extra care as well with any HX3D keys which stand up above the board, removing them gently from the key base rather than the printed figure on top.
Once the keycaps are removed
Once the keycaps have been removed, get rid of any loose debris from the keyboard. Hair, dust, and food bits can easily get trapped under the keys and this is your chance to clean it all out. This can be done by turning the keyboard over and shaking the debris out, or by taking a can of compressed air and blasting the debris away. If using compressed air, be careful not to spray for too long or you'll rapidly cool and create moisture on the keyboard.
To clean up any spills that may have occurred, take a damp microfiber cloth and wipe up the liquid. Make sure you are very careful to not get any water directly into the keyboard as most mechanical keyboards are not water-resistant. You must put the water onto the cloth and use that to remove any debris or sticky substances. If you do spill any water directly on the electronics, make sure you leave the keyboard to dry thoroughly – at least overnight – before connecting it to power again.
If deeper cleaning is necessary, you may take isopropyl alcohol and apply it to the cloth, once again taking great care to never directly apply any liquid directly to your keyboard and keyswitches. After cleaning the inside of the keyboard, move your attention to the keycaps and clean them as well. If the keycaps are very dirty you can use a small amount of isopropyl alcohol placed on a microfiber cloth to clean each keycap individually. If you don't want to clean the keycaps individually, you can clean them while they are attached to the keyboard by wiping them with a slightly damp microfiber cloth.

If you need to clean any 3D printed keycaps from the HX3D collection, we recommend applying a small amount of water only to a microfiber cloth and wiping gently. More abrasive actions or solvents may risk damage to the paintwork on the keycap.
Placing the keycaps back on
After making sure that there is absolutely no residual liquid or moisture lingering in the keyboard, turn it over and let it air dry overnight for good measure. Once the keyboard is completely dry, put the keycaps back on one by one. If you washed the individual keycaps, make sure they’re also completely dry when you place them back onto the keyboard. Reference the article linked here for a more complete guide on how to put keycaps back on. Once the keycaps are on the keyboard take a slightly damp microfiber cloth and wipe off the keycaps one more time.
Aftercare
Once everything is on the keyboard, turn the keyboard upside down once more and let it dry overnight again. This might seem like an overabundance of caution, but you want to be completely certain that there is absolutely no residual moisture left in the keyboard before you connect it and run electricity through it. The more drying time you give the keyboard, the safer it’ll be.
Looking for another way to refresh your keyboard? Consider swapping out tired keys with HyperX’s 3D printed keycaps. Fantasy fans can pick up the RPG Movement Set – in four different color choices – to equip their keyboard for any adventure, while shooter fans can gear up with the the FPS Bundle including keycaps for actions like grenades, crouch, and melee strikes.