The shinobi prosthetic tools in Sekiro: Shadows Die Twice offer exciting ways to change up your fighting style. As well as being a ton of fun to play with, each of the prosthetic tools serves a purpose, proving effective in combat against specific enemy types. You won’t start with them all though, and unlocking them isn’t as simple as levelling up or progressing through the story. To earn each tool you’ll need to explore the world thoroughly, eavesdrop, and even splash out some cash every now and again.
We’ve put together guides for each of the shinobi prosthetic tools in Sekiro: Shadows Die Twice, and in this
All Shinobi Prosthetic Tool locations in Sekiro

So far we know of seven prosthetic tools in Sekiro: Shadows Die Twice. We’re working on getting guides up for all of them, and we’ll update this article when we have each of them
Looking for a specific guide? Click these hotlinks to skip down the list!
- Loaded Shuriken
- Loaded Axe
- Flame Vent
- Shinobi Firecracker
- Loaded Spear
- Mist Raven
- Loaded Umbrella
- Sabimaru
- Divine Abduction
- Finger Whistle
Loaded Shuriken location

Cost: 1 Spirit Emblem
Location: Ashina Outskirts
The Loaded Shuriken is the first shinobi prosthetic tool you'll have the chance to obtain in Sekiro. You can pick up the shuriken while exploring the Ashina Outskirts. From the Outskirts Wall Sculptor's idol, grapple to the gate structure ahead and enter through the hole in the wall. To your left will be a dead enemy, and on his


Loaded Axe location

Cost: 2 Spirit Emblems
The Loaded Axe is a powerful weapon designed to smash the shields of enemies. You’ll be able to grab this prosthetic early in Sekiro, provided you know how to access the Hirata Estate story path. Click here for our guide to the Loaded Axe location.
Flame Vent location
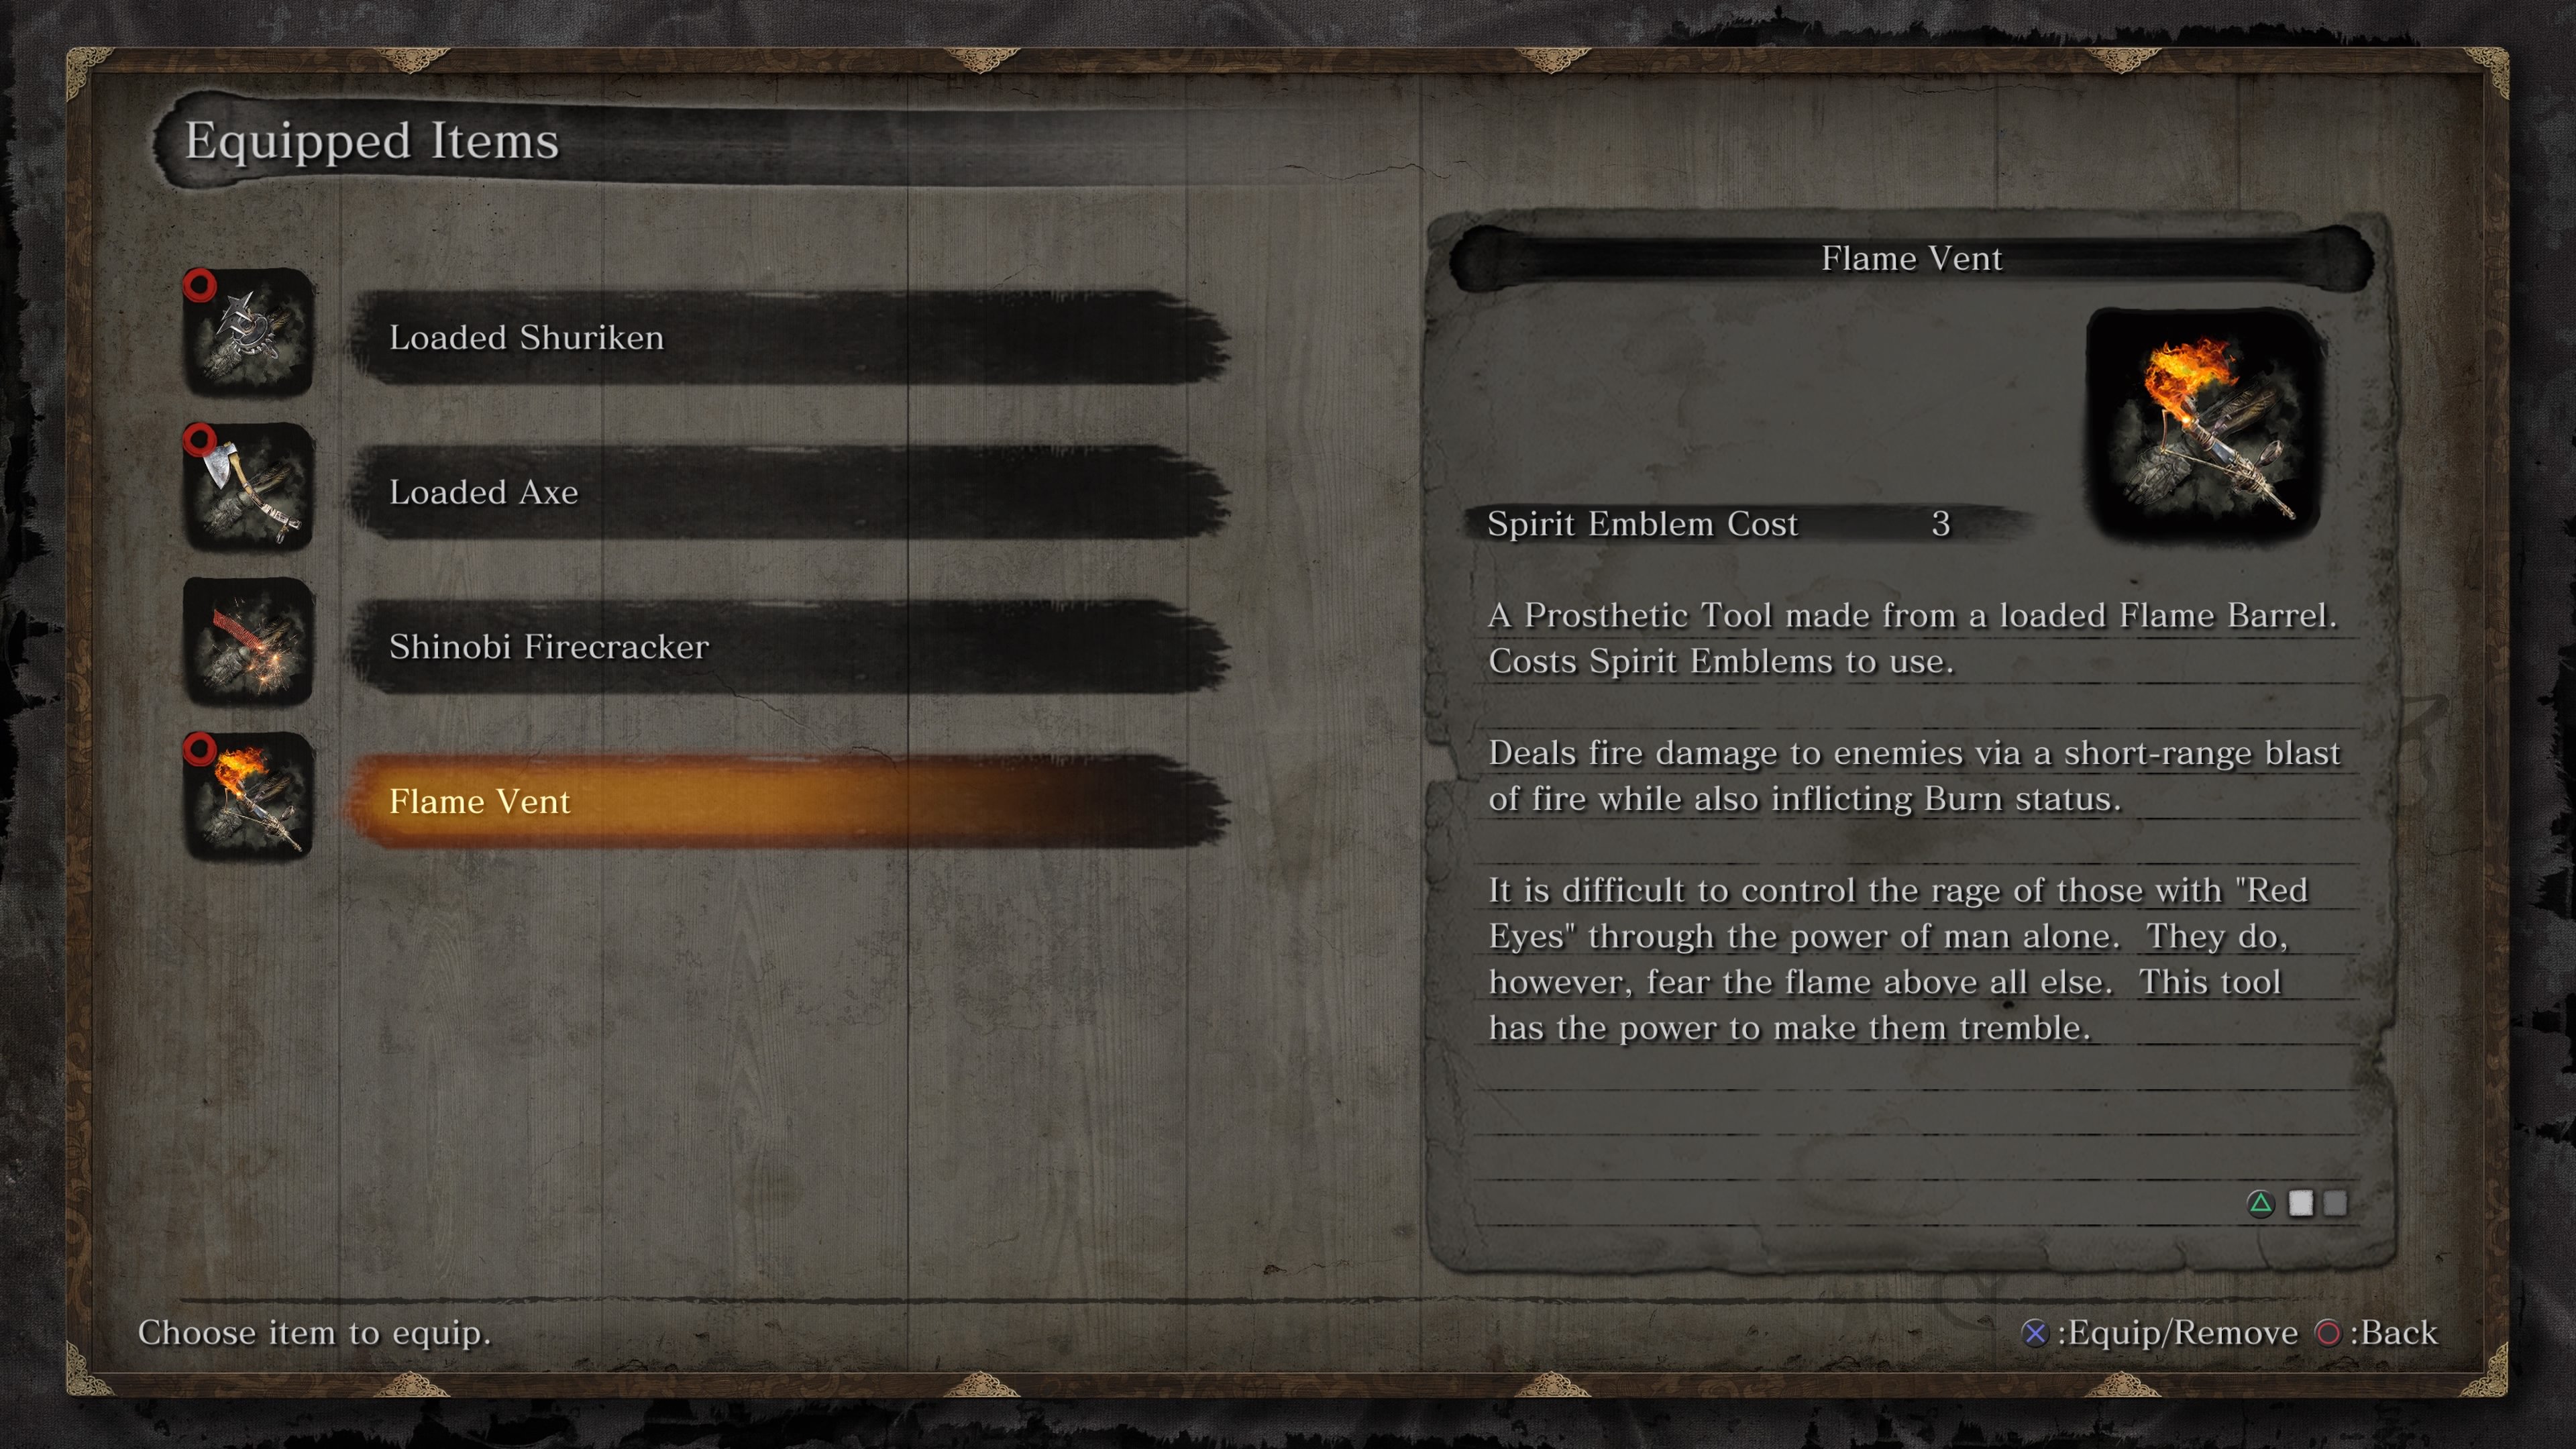
Cost: 3 Spirit Emblems
The Flame Vent produces a
Shinobi Firecracker location

Cost: 2 Spirit Emblems
The Shinobi Firecracker is a brilliant tool in boss fights, stunning many enemies and staggering animals like Gyoubu Oniwa’s horse or the Blazing Bull. One of the easiest prosthetics to miss, it can be collected very early in the Ashina Outskirts. Click here for our guide to the Shinobi Firecracker location.
Loaded Spear location

Cost: 1 Spirit Emblem
The Loaded Spear is available once you reach Ashina Castle, and is useful for pulling enemy soldiers in from range or ripping the
Mist Raven location

Cost: 2 Spirit Emblems
Mist Raven is a defensive prosthetic tool that only produces an effect when struck by an enemy. If you’re hit while activating it, Wolf will disappear in dark smoke and feathers, reappearing some distance away. If your posture is close to breaking then Mis Raven can be a lifesaver, but it’s best used when upgraded to allow for a counterattack. Mist Raven is one of the toughest prosthetics to find, so click here for our guide to the Mist Raven location in Sekiro: Shadows Die Twice.
Loaded Umbrella location
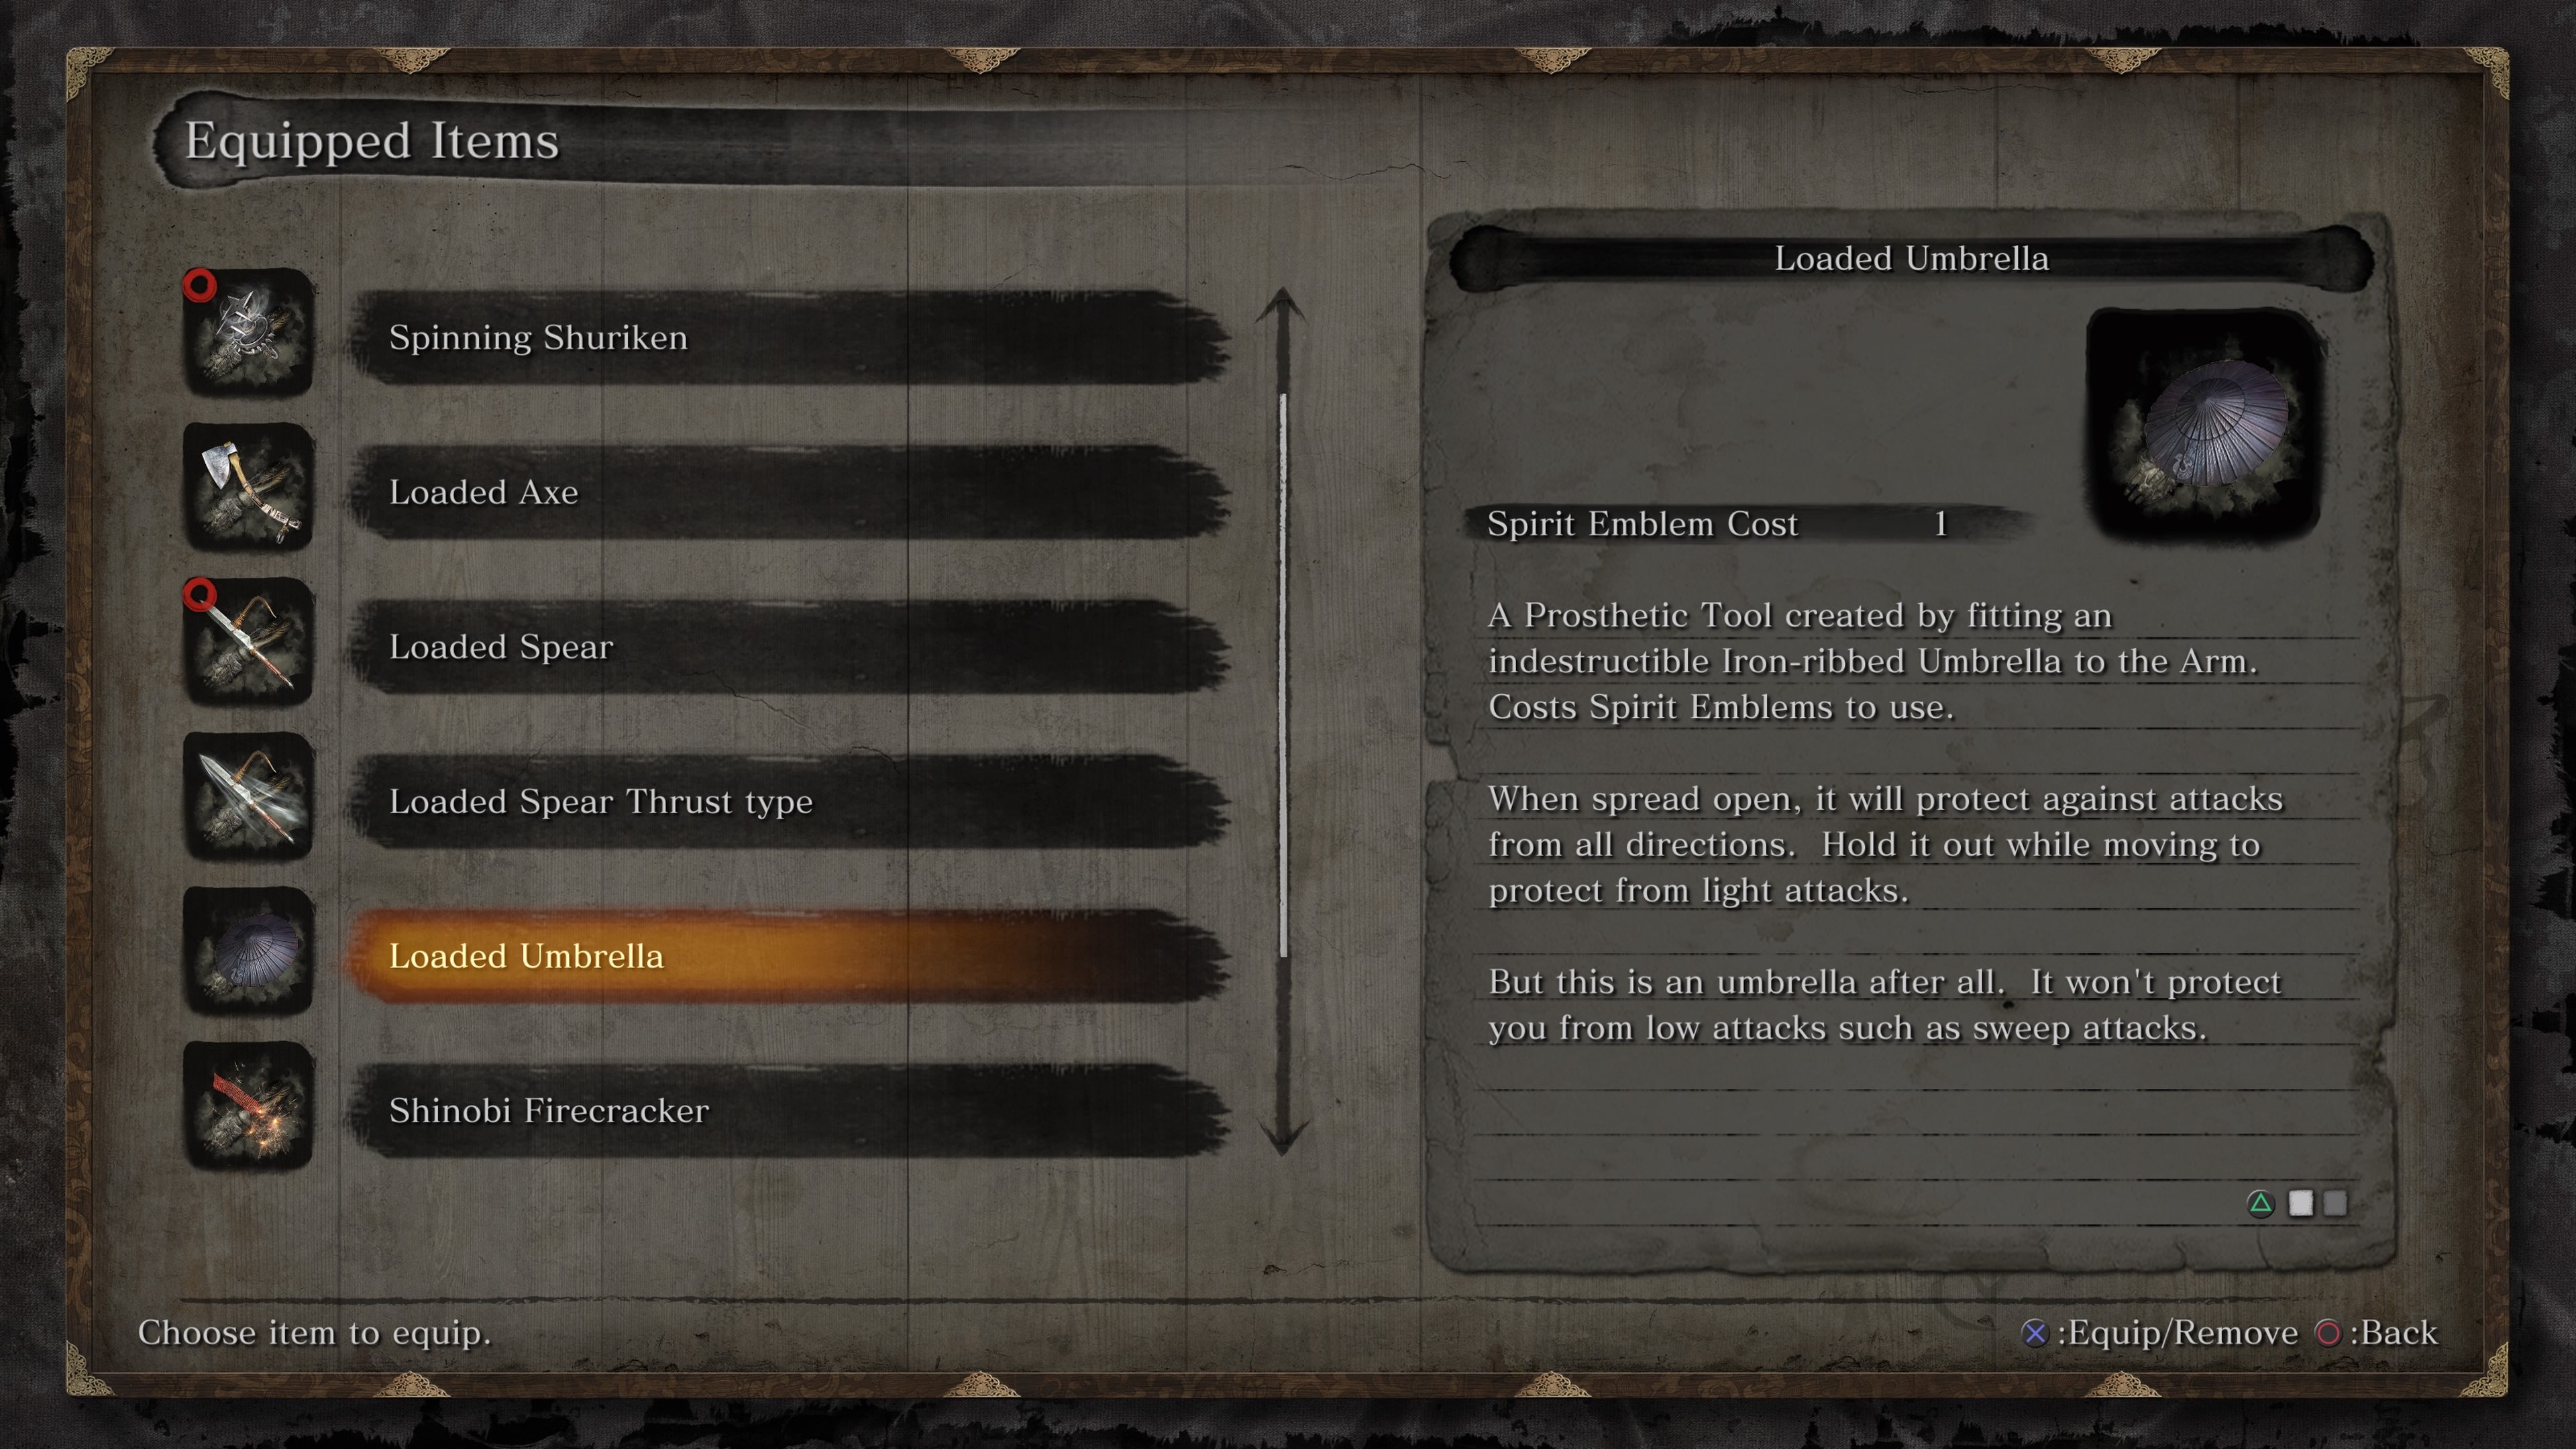
Cost: 1 Spirit Emblem
Sabimaru location

Cost: 1 Spirit Emblem
Sabimaru is a special prosthetic tool sword that comes coated with poison. It can be used to unleash a flurry of strikes in tandem with your regular sword, inflicting poison damage on anyone who gets in its way. It's also one of the easiest shinobi prosthetic tools to completely miss as you progress through the game. Click here to read our guide on where to find the Sabimaru location in Sekiro: Shadows Die Twice.
Divine Abduction location

Cost: 3 Spirit Emblems
When activated, Divine Abduction creates a large gust of wind that can be used to push back enemies or spirit them away forever. The Divine Abduction can also be used to help the large NPC named Kotaro in Senpou Temple. Click here for our guide on the Divine Abduction location in Sekiro: Shadows Die Twice.
Finger Whistle location

Cost: 3 Spirit Emblems
The Finger Whistle is a special tool that can be used to drive beast enemies mad and unable to distinguish friend from foe. It can also be used to lure in individual enemies from a distance with a precise call. Obtaining it requires taking on an extremely tough boss, so click here to learn the Finger Whistle location in Sekiro: Shadows Die Twice.
You now know all the Shinobi prosthetic tools in Sekiro: Shadows Die Twice, and once you've collected them all you'll be rewarded with a well-earned trophy or achievement. After more Sekiro guides? We can explain how death and