With games like The Legend of Zelda: Breath of the Wild headlining the launch of the Nintendo Switch, it’s important to know how to take screenshots of impressive scenery and other cool in-game moments. This guide will explain how to take a screenshot on the Nintendo Switch, as well as how to share those screenshots online.
How to Take a Screenshot
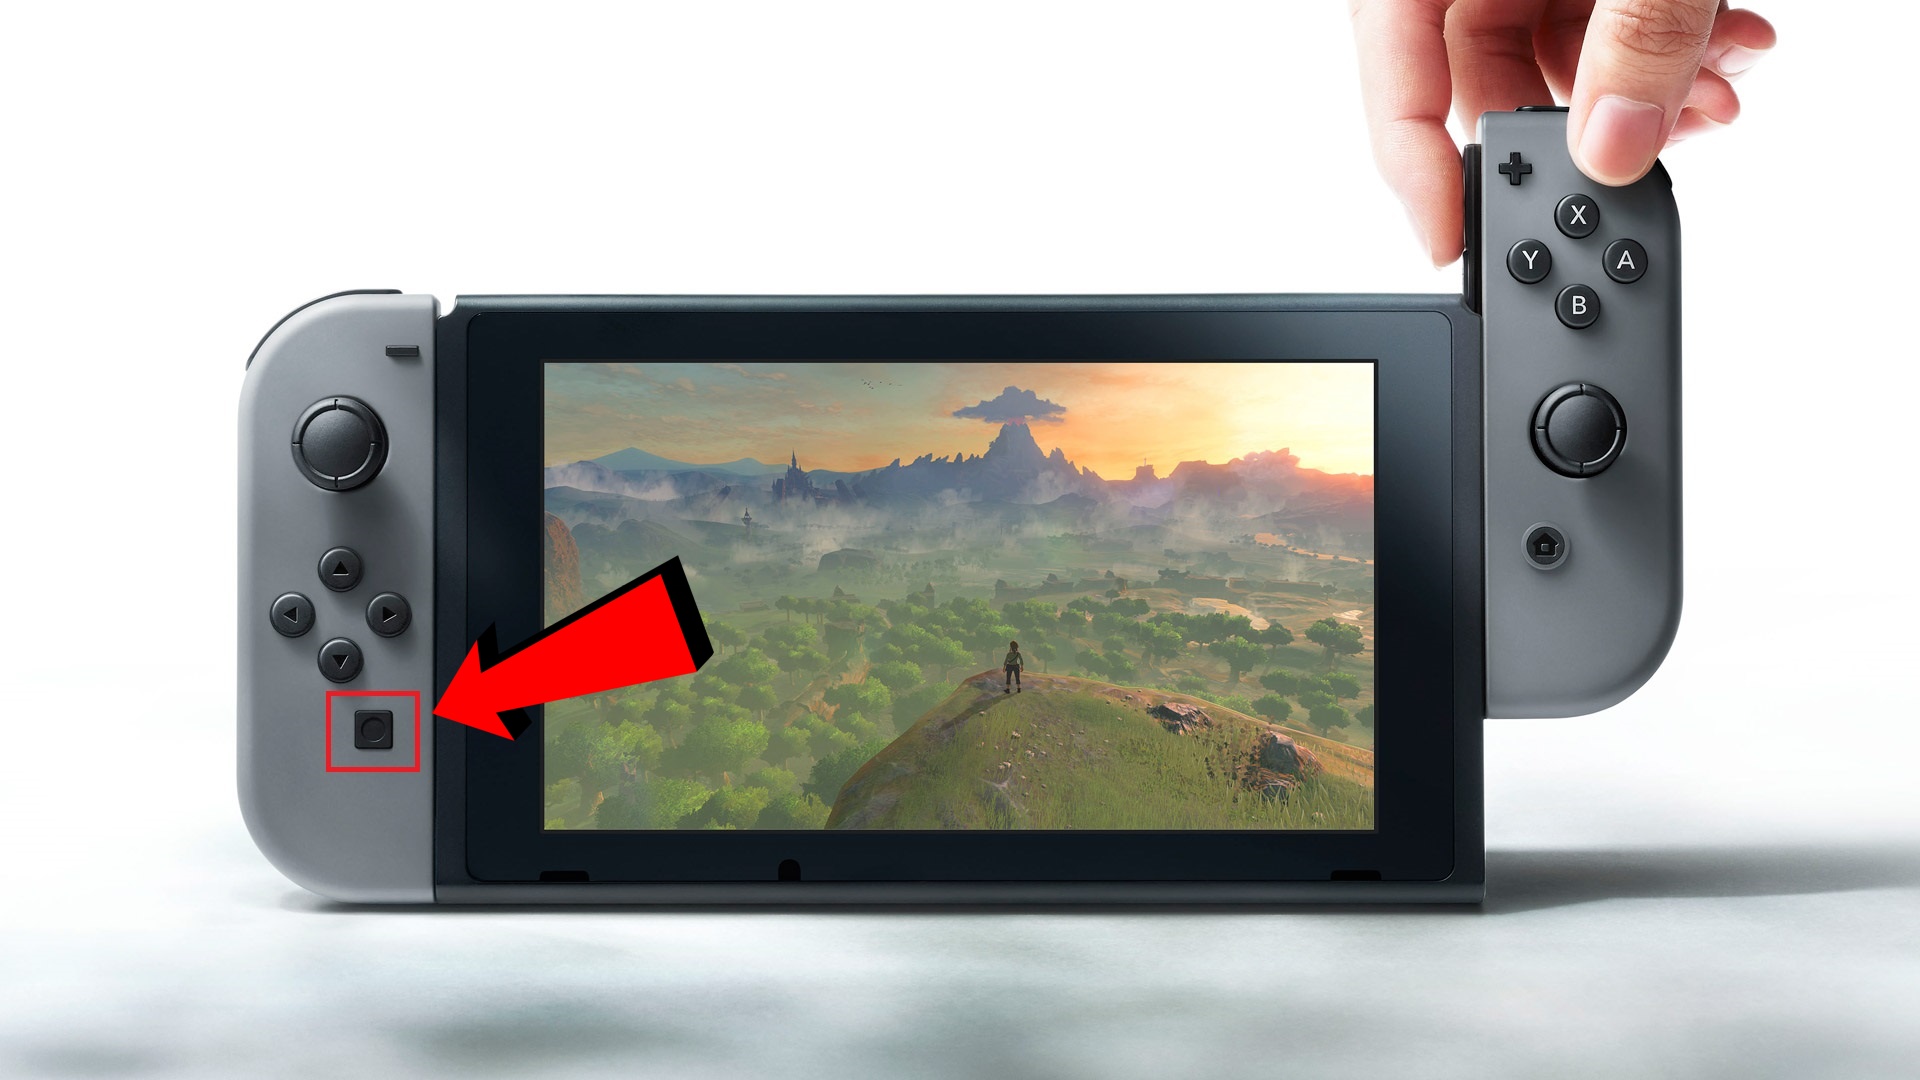
Taking a screenshot on the Nintendo Switch is as simple as knowing which button to press. To take a screenshot, simply press the square button on the Left Joy-Con controller to capture an image of your current screen. The main purpose of this button is to take screenshots, so don’t lose your Left Joy-Con if you want to capture screens.
How to Share Screenshots
Once you take a screenshot on the Nintendo Switch, the image will be stored to a personal album on the Switch’s internal storage. If you’d prefer to have your screenshots save to an external MicroSD instead, you can change these preferences in the system settings under Data Management > Manage Save Data/Screenshots.
To access your screenshot photo album on the Nintendo Switch, press the A button. Press A again to open the Editing & Posting options. This will allow you to add text to a photo, copy an existing screenshot to a new location, delete a screenshot, or post a saved screenshot online.
The Post function lets you share a screenshot to a linked social media account. The Copy function can copy screenshots directly onto your external MicroSD card if you have one inserted on the device. A smart phone or computer can also be used to access copied screenshots in the Nintendo Switch photo album.
Now that you know how to take and share screenshots on the Nintendo Switch, you’ll have nothing standing in you way of capturing breathtaking photos and screens from your favorite Switch games.