


Many people were unhappy to find that capturing gameplay and streaming on the Nintendo Switch wasn’t possible through a simple push of a button on launch. Thankfully, Nintendo has updated the system to allow for short captures, but for more in-depth methods you will need to spend some cash. Here are the different ways to capture gameplay on the Nintendo Switch.
How to capture gameplay on Nintendo Switch
Controllers come with a built-in capture button, but as of right now it’s only capable of taking screenshots or recording the last 30 seconds of video. If that's enough for you, then all you need to do is hold down the capture button (marked with a square) and wait for the capturing message to appear at the top of your screen. It records whatever happened in the 30 seconds before you pressed down the button, so don't worry about hitting it in advance. It's really simple and will allow you to post clips (with some brief editing) to Twitter or save them to an SD card. For longer captures, check below:

Using a capture card
The Nintendo Switch does come with HDMI support which means you can capture gameplay and stream in TV mode using an HD capture card. For newcomers to this method, we’ll cover how to hook up your console to an external device such as those supplied by Elgato or AVerMedia.
Although a bit pricey, a capture card is a nifty piece of hardware that's well worth your money since you can use it to stream off any console using your PC. It also provides you with more customization options than any of the built-in streaming features that come with consoles such as the PlayStation 5 and Xbox Series X/S.
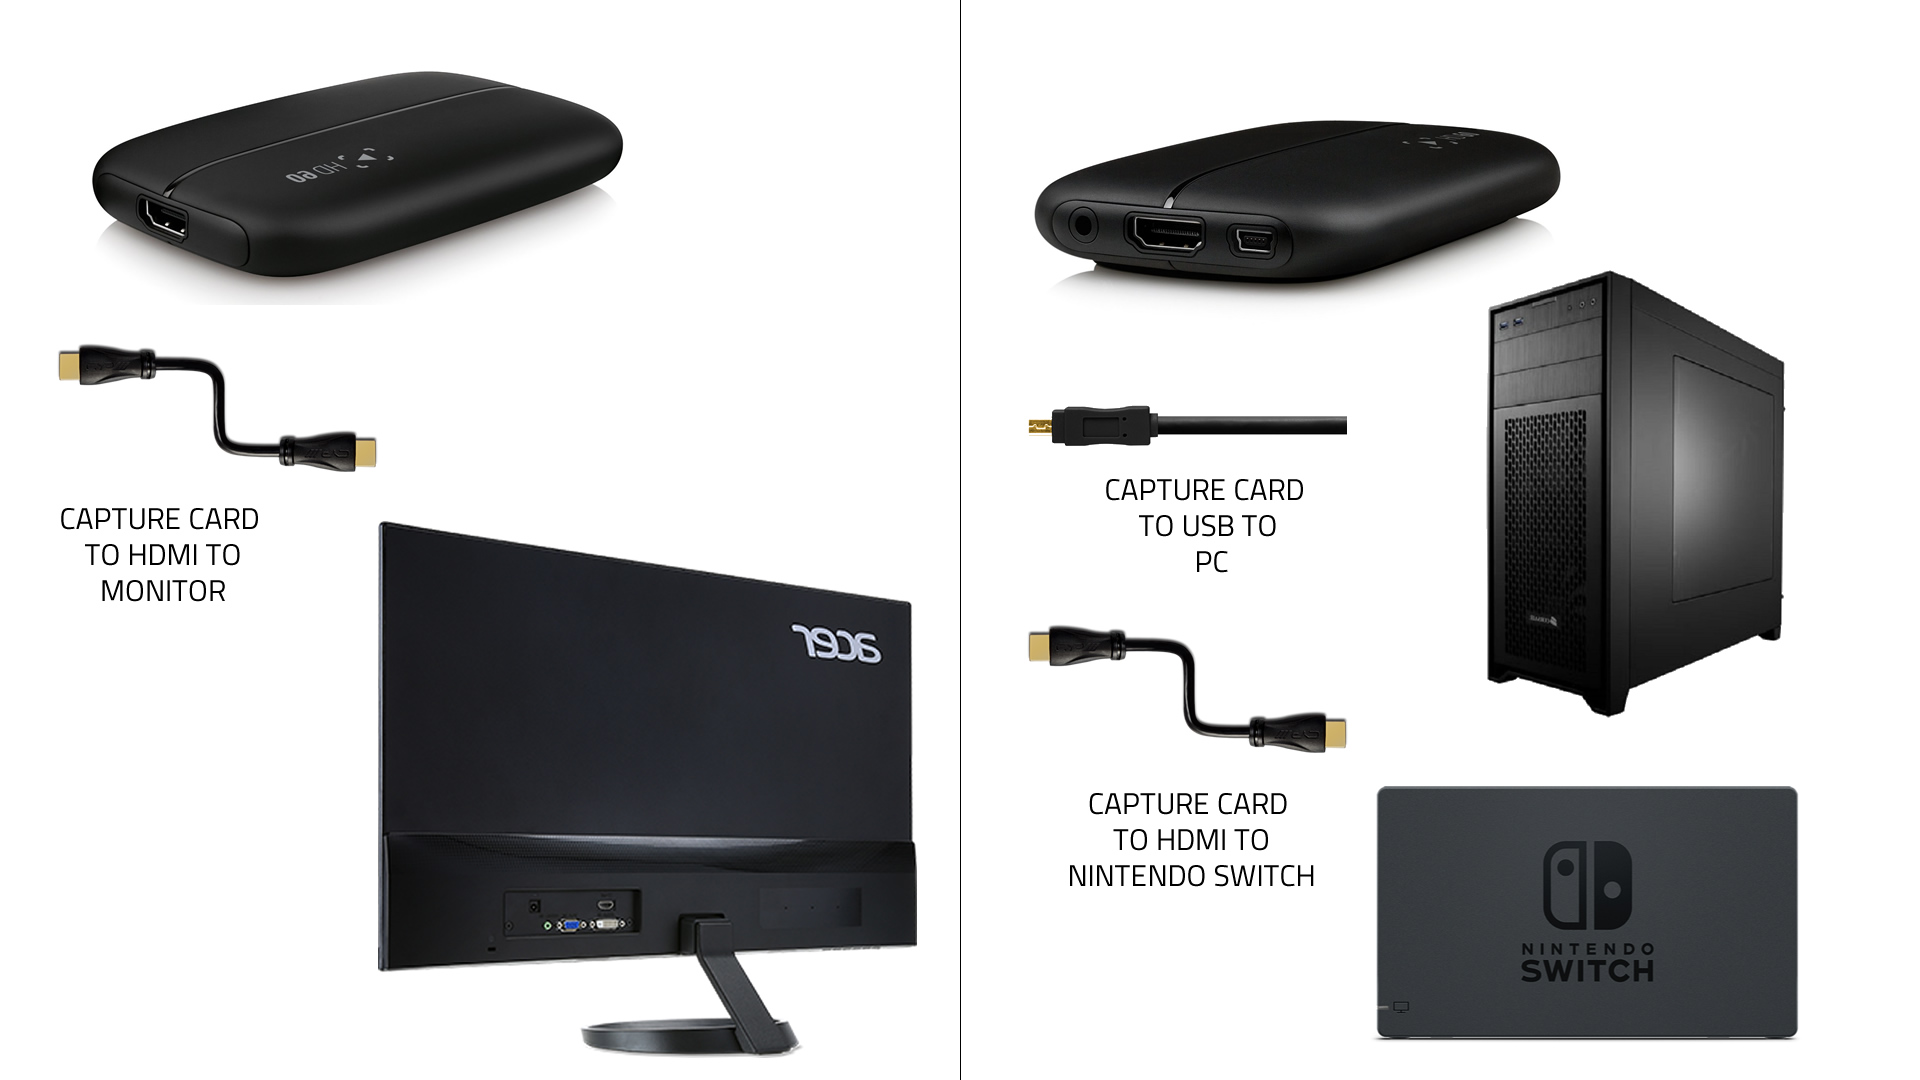
Once you’ve purchased an HD capture card, you’ll want to examine the instructions and install the software. Before you start connecting wires to the card, you’ll want to make sure that your Nintendo Switch connects directly to your monitor with no problems.
Once you’ve confirmed that, you can start by connecting the USB cable from the capture card to your PC. Then, detach the HDMI cable from your monitor or TV and then attach it to the HDMI “IN” port on the capture card. Finally, you’ll want to take another HDMI cable, connect that to the back of your monitor or TV and into the HDMI “OUT” port on the capture card.
Open up the game capture software for your capture card of choice on your PC or laptop. It should automatically render the display on your monitor and in the software. Congratulations! Now, all you have to do to capture gameplay on the Nintendo Switch is hit the record button. It'll save to the folder assigned by the capture software, making it easy for you to collect the recordings afterwards.