
A new map means new recon bolt opportunities for Sova in Valorant. Rather than spend hours memorizing pixel perfect lineups, we’ve rounded up a selection of easy to remember Breeze Recon Bolt spots you won’t forget in a hurry. Give these Sova Recon Bolt lineups for Breeze quick practice offline, then use them to outwit your opponents in matches.
Valorant - Easy Breeze Recon Bolt spots you won’t forget

© Riot
Much like our Icebox, Haven, and Ascent Recon Bolt guides, we’ve tailored this guide to the attacking side as it’s here that most players struggle. In each attacking spot below we’ll list where to stand, where to aim, how much power to use, and where the bolt will land. We've attempted to minimize confusing lineups, but Breeze is a trickier map than most to make effective use of Sova Recon Bolts. Click the links below to jump to an individual Icebox Recon Bolt spot you’re after, or scroll down to see them all.
- Mid Recon Bolt 1
- Mid Recon Bolt 2
- Mid defense Recon Bolt
- A Site Recon Bolt 1
- A Site Recon Bolt 2
- B Site Recon Bol 1
- B Site Recon Bolt 2
Attacking Mid Recon Bolt spot 1
- Charge: 3 bars (full power)
- Bounce: None

© Riot
This first Mid Recon Bolt spot will clear anyone pushing forward from the defending side into Elbow, as well as anyone close to Nest. You’ll need to stand in the back corner of Mid Bottom near to the partially open shutters with tape and closed sign.

© Riot
Turn around and aim towards the tower you see in the distance. On the lower section, you should be able to see a gap between a thin upright pipe and the main tower. Aim roughly midway up in this gap. Fire at full power with no bounces.

© Riot
This Breeze Recon Bolt spot lands on the corner of the wall, scanning the top of mid, most of next, and the elbow area as well. It’s an easy one to shoot for most defenders, however.
Attacking Mid Recon Bolt spot 2
- Charge: 2 bars
- Bounce: 1

© Riot
If you absolutely want to clear Nest, this is the arrow to use. Starting from the left side of Mid Bottom, stand on the right side of the pipe next to the water bar.

© Riot
Aim towards mid, and just to the right of the corner of the wall in front. Charge two bars and one bounce. Be careful not to aim too close to the wall or you’ll hit it.

©
This Breeze Recon Bolt spot will land at the back of Nest, revealing anyone stood inside the room. Alternate this one with the first mid arrow to catch out defenders.
Defending Mid Recon Bolt Spot
- Charge: 3 bars (full power)
- Bounce: 1
© Riot
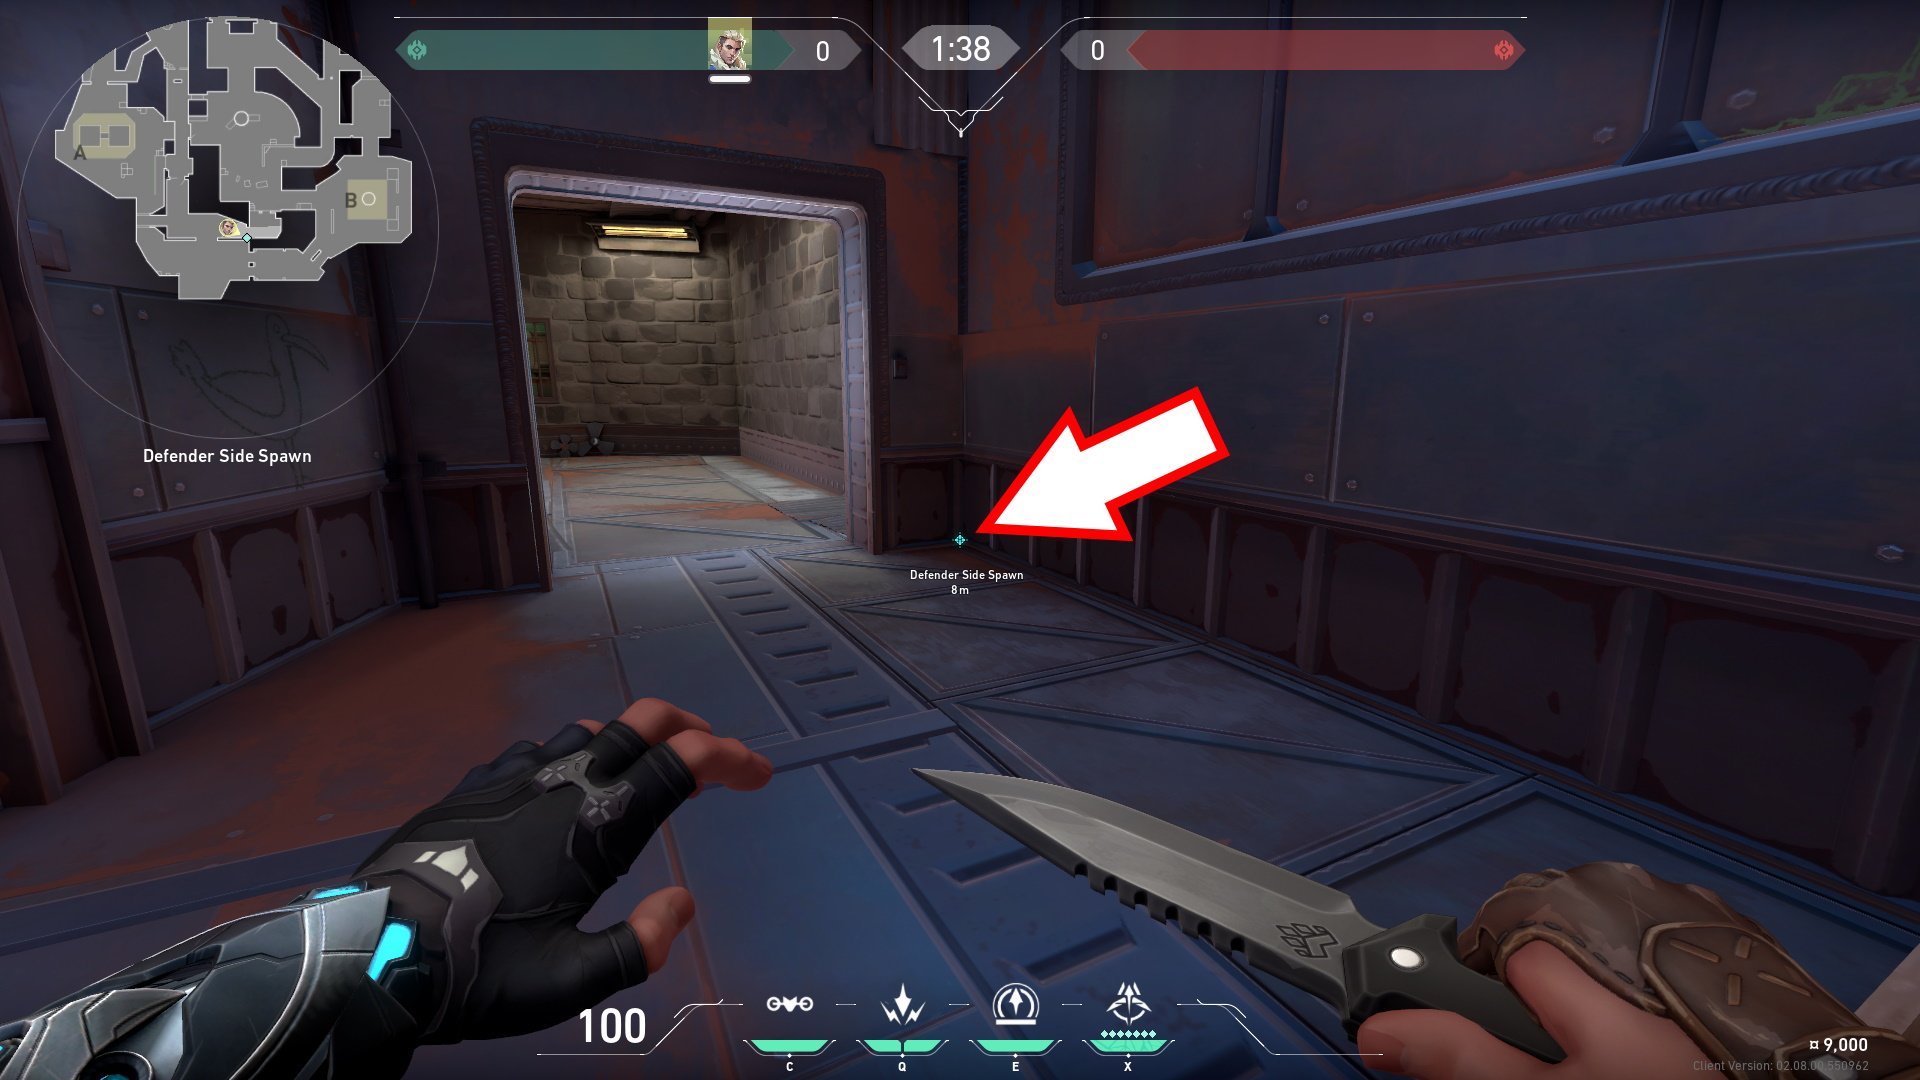
We don't usually cover defense in these guides, but mid is a valuable spot for Sova to play, so here's an easy lineup for the start of a round. Start by standing in this nook next to the entrance to Nest.

© Riot
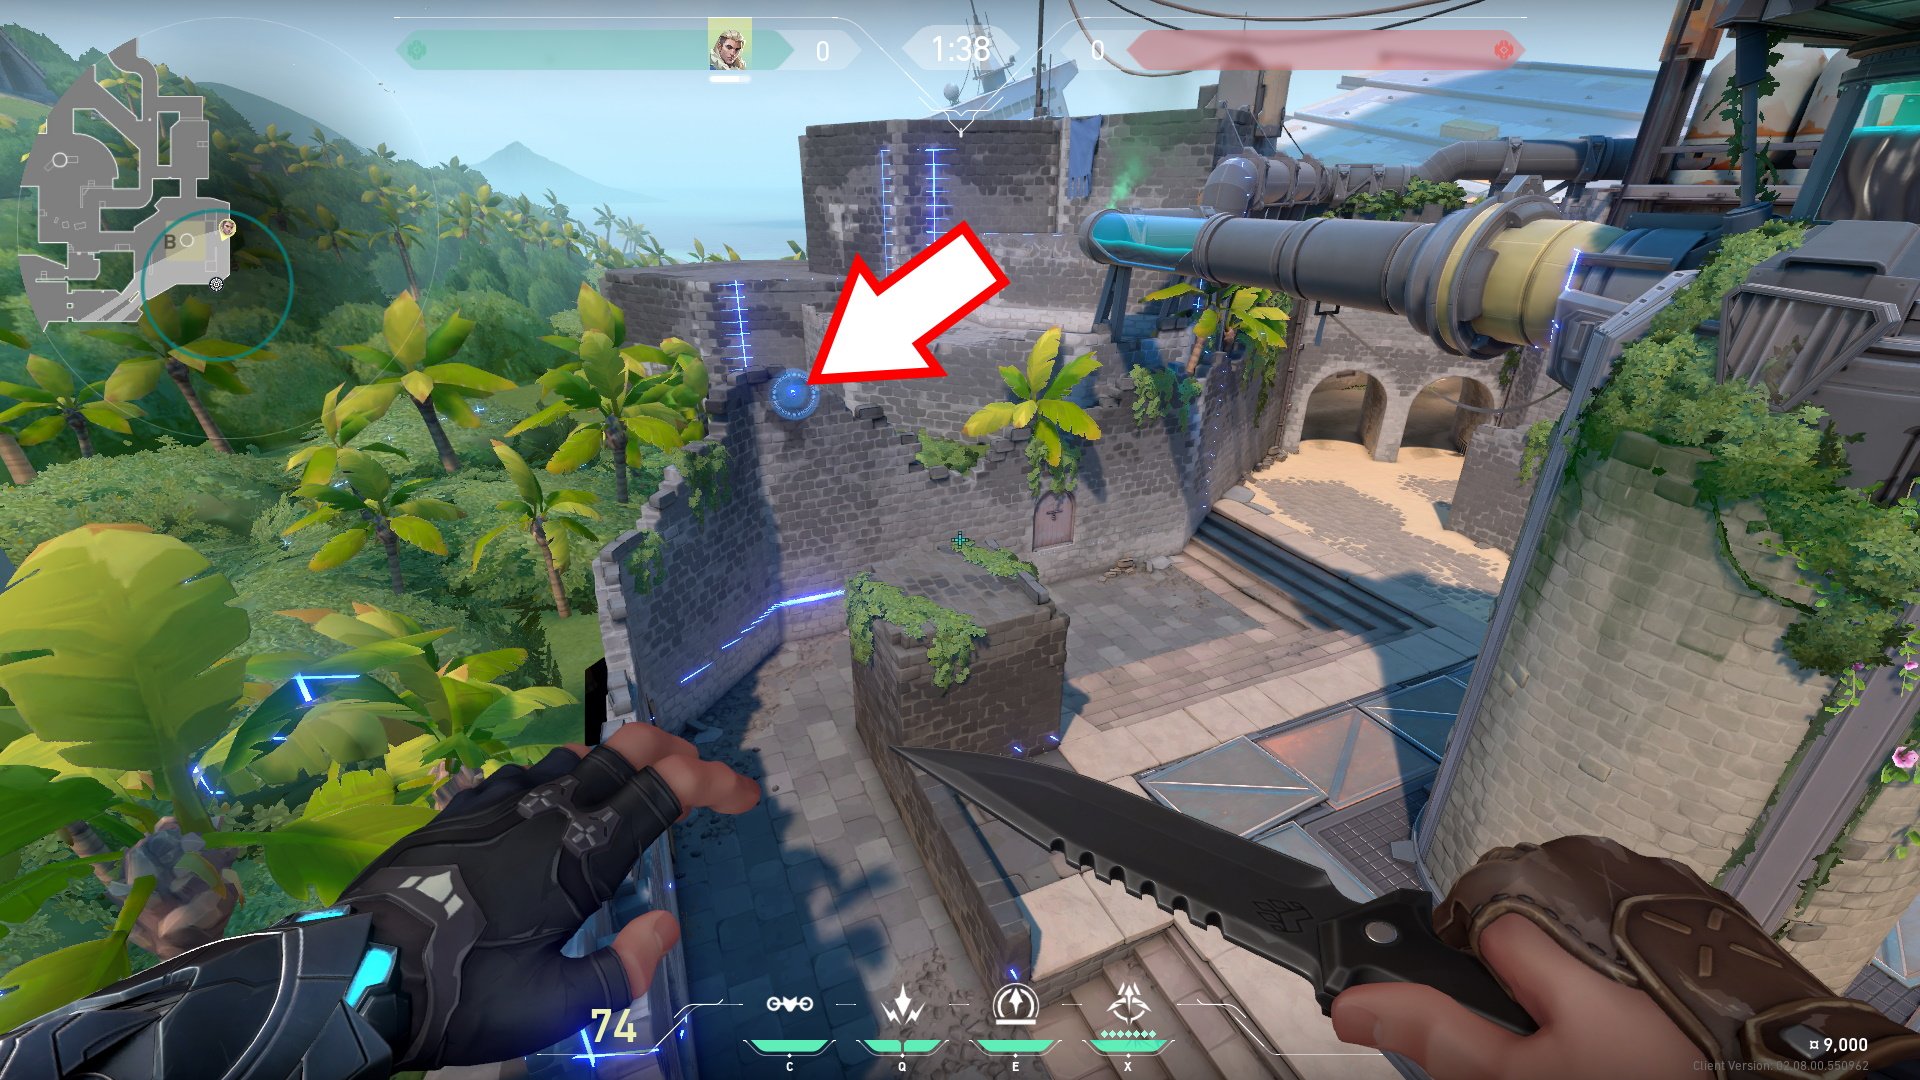
Look at the wall on the B-Side of Nest's exit. Aim at the bottom of the thin slit window visible here. Charge one bounce at full power.

© Riot
This Breeze Recon Bolt spot lands on the rusty wall at the entrance to mid, so should catch anyone pushing up towards the central pillar. Mid is vital in Breeze, so expect a lot of aggression here.
Attacking A Site Recon Bolt spot 1
- Charge: 3 bars (full power)
- Bounce: None
A site is one of the trickier recon bolt sites as it’s so large that covering all angles is impossible. Still, we’ve got two fairly simple attacking recon bolt lineups for Breeze, both starting in A Lobby. For the first, wedge yourself into the gap between this buoy and the rock.

© Riot
Next, you need to aim up in the sky such that the left side of the line under your health bar lines up with the corner of the metal strut, as shown below. It sounds tricky, but it’s actually much, much easier to remember than you’d expect. Fire at full charge with no bounces.

© Riot
This arrow lands on the ground behind the two pyramids. Be warned that this one takes a long time to land, meaning it’s not good for rushes and enemies can reposition themselves once they know it’s coming. Still, it takes so long that many players forget about it after you've fired.
Attacking A Site Recon Bolt spot 2
- Charge: 2 bars
- Bounce: 2

© Riot
Because that first arrow isn’t perfect, you’ll want to alternate with a second position. For this one. Jump on top of the rock and stand in the center of the life ring in A Lobby.

© Riot
Looking to the left of the tunnel entrance, you should see a metal girder sticking out from the top of the wall. Aim your crosshair at the line of the metal corner behind and just above this. Again, it sounds tricky but you don’t need to be perfectly precise with your positioning or your aim. Charge two bars with two bounces and release.

© Riot
This arrow lands on the wall next to the pyramids, revealing anyone hiding behind the pyramids, but won’t cover the boxes or tunnel doors.
Attacking B Site Recon Bolt spot 1
- Charge: 2 bars
- Bounce: None

© Riot
Start by wedging yourself into the space between the cannon and its wheeled housing unit in Mid Cannon. Aim up towards the site and you’ll see a cannon poking above the wall next to you, with some greenery sticking out next to it.

© Riot
Aim such that the H in CHARGE sits over the small gap in the greenery next to the cannon. Again, this isn’t a precise placement so don’t stress it too much. Charge two bars, no bounces, and release.
© Riot
This Breeze Recon Bolt spot will land on the wall in the back left of the site, revealing anyone hiding down the left alley or behind the central pillar. Be warned that it doesn't cover the sharp left corner as you enter the site, our next arrow will handle that.
Attacking B Site Recon Bolt spot 2
- Charge: 2 bars
- Bounce: None

© Riot
This next arrow aims to clear the close left corner and alleyway on B Site. Start by wedding yourself between the wall and wheels of the cannon in Mid Cannon.

© Riot
Aim up and towards the same cannon from the last bolt. This time, line up the top of the second charge bar line with the dangling leaf above the cannon. You don’t need to be all that precise, just remember that the line goes with the leaf. Charge two bars and release.

© Riot
This Breeze sova dart will land on the wall above the close left corner, clearing those pesky shotgun players out from the position. This way you only need to watch the right side of the site as you enter.
Those are all the easy Valorant Breeze Recon Bolt Spots we’ve found so far, but we’ll aim to update this guide as simpler and more effective arrows are discovered. Check out our Icebox, Ascent, Fracture, and Haven guides for more Sova skills. Head to our Valorant hub page for more tips and tricks for the game.